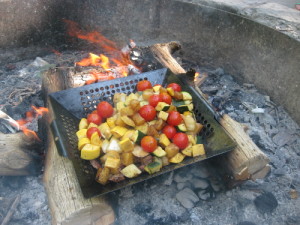
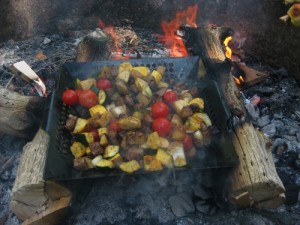
What is the right spelling for kebab, anyway? Is it kebab, or kabob, or even kabab or kebap? I see all of those out there. No matter, there are fun to cook and this picture is essentially a kebab, but without the skewers and cooked in my grill basket right over the open fire! Now …
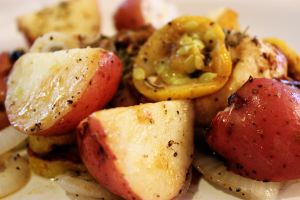
This was an easy, tasty dish cooked in aluminum foil on the grill. Nothing hard about and you cook individual servings in foil packets, which makes cleanup easy. While this recipe uses red potatoes, yellow squash, and onions, you could add any other veggies that would like, such as green beans, peas, or carrots. You …
I don’t know if many of you use Pinterest or not, but I find it an interesting website to share the pictures of things that you like. It’s kind of like a bulletin board where you create boards to organize your “pins” into different topics. When you see a picture that you like on a …
]I was heading up the canyon last week to do some cooking, including a Dutch Oven Strawberry Rhubarb pie for the Outdoor Cooking Magic Challenge and was trying to figure out what to cook over a campfire. We have some beautiful spots just minutes away from where I live and it’s fun to get up …
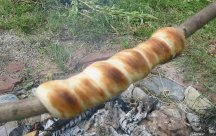
Bread-sticks are easy to cook over the campfire. All you need is some refrigerator biscuits, a stick, and a campfire. Kids will love cooking these, because you can eat them write off the stick!
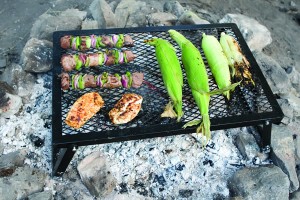
If you enjoy cooking over a campfire, a campfire grill is very handy. With a portable campfire grill, you can cook hamburgers, hot dogs, steaks, even pancakes over the fire! Pick between one of these great campfire grills.
Here’s another use for zip-lock bags, and it is has the added benefit that it will save you from cleaning pots and pans after breakfast (or another other meal, for that matter). First of all, get a large pot of water boiling on the stove. Make sure that you have one quart size freezer zip-lock …
Zip-lock bags are extremely helpful when cooking outdoors. They come in a variety of sizes from 1 pint to 2 gallons. There is no need to buy expensive ones for most uses. You should be able to find off-brands at grocery stores, discount stores, or dollar stores. Here are some ideas and tips for using …

Recent Comments